
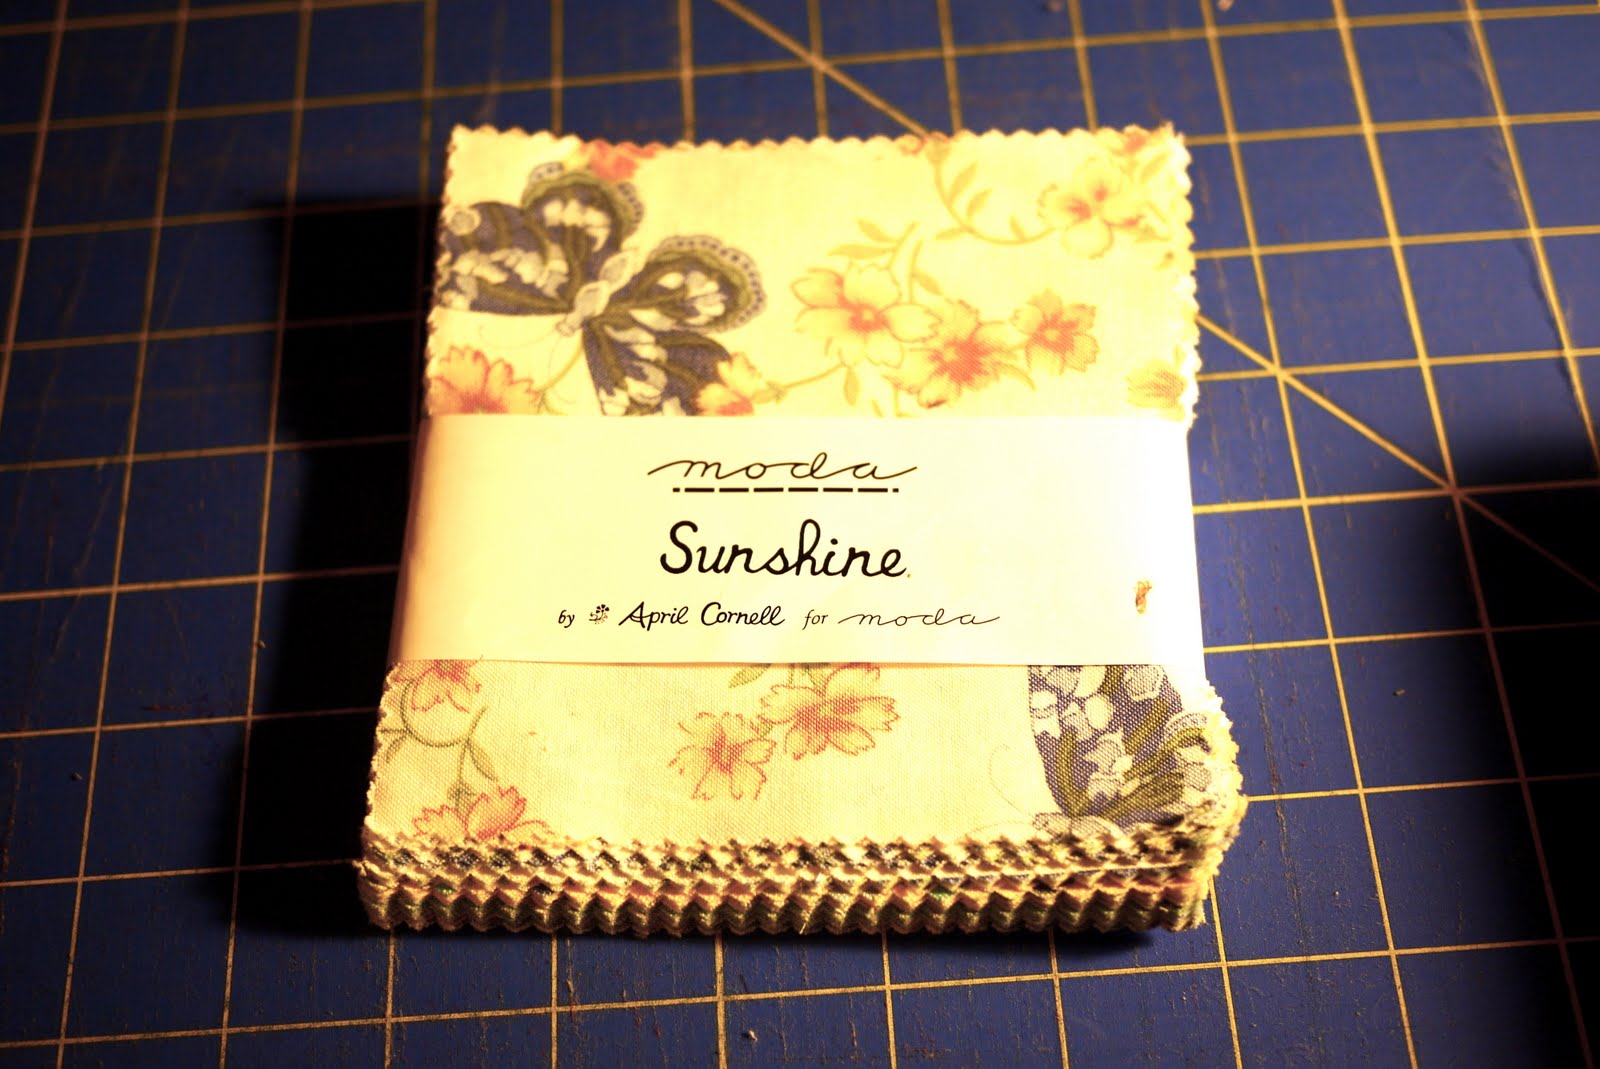
I started with 2 packs of charm squares. A charm pack is usually a line of fabric cut into 5 inch squares. Now if you don't have any charm packs, just cut your basket fabric into 5 inch squares.
Today I'll use this pack and make a small something to demonstrate. (Save that piece of cardboard in your pack, we'll be using it)
 1. Cut the fabric that will be your baskets in half, on the diagonal, so that you end up with 2 triangles.

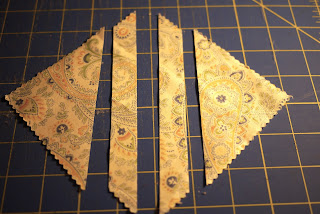 2. Next cut from those diagonals, a bias piece for the handle, at 3/4 of an inch.
 3. The background, which will tie all those fabrics together, can be cut from yardage, or another charm pack. If you are using a charm pack, do exactly the same thing as you did with the basket fabric.
If you are using yardage, cut your squares at 3 7/8.
For every basket square, cut a background square.
 4. Remember that cardboard piece, we'll be using it now. Take your Wonder Woman mug... oh, what you don't have one? Well use a normal everyday cup or mug and make a half circle. Make sure that it fits on your background triangle.
 5. Take that template and cut it out and now use it to mark your background triangles for your handle placement.
 6. Now it's time to use those 3/4 inch strips. I use a Hera marker (shown above) to mark my strips a little over an 1/8 of an inch.
 7. Then fold those strips (they are cut on the bias) around the line. Pin and sew. I needle turned, you can do what ever method you're comfortable with.
 8. After sewing the handle down, trim, then find their fabric mates and sew together. These little baskets will finish at 3 1/2 inches.
 Continue this till you have as many basket blocks as you wish to have.
 This is enough to get you going. I'll be continuing this next Tuesday and give you all another lesson to finish these little guys up.
 This is enough to get you going. I'll be continuing this next Tuesday and give you all another lesson to finish these little guys up.
Good luck and let me know if I forgot something or if you have any questions.
Take care, Brandie
12 comments:
Wonder Woman. Now I know how you accomplish so much!
Thanks for the tutorial. I'll be checking in next Tuesday for some more.
Hope you have a great week.
LOVE these little guys...My fabric is waiting...hope I can find time today to cut these little beauties out!! If not this afternoon then tonight for sure!! Thanks sew much!!
P
Awesome tutorial!! I just love those baskets!!
What sweet basket blocks and you make it look so easy!
You beaut ! Definitely going to try this. Don't know how I'll go on needle-turning though. That might defeat me. I had been looking for something that appealed to me using charn squares. Thanks for sharing.
Oh!!! Now I know what to do with those two charm packs that have stared at me from my shelf for a year. :D Thank you so much.
great tutorial! I love baskets.
Great tutorial Brandie!
Fabulous, I have a charm pack that has been marinating in the drawer, this is a good take along once you get the stems done!
Love what you did with the charm squares. I will be putting these on my to do list. I have a charm pack of lilac hill fabric.
Thank you a lot. I really love it.
Thank you a lot. I really love it.
Post a Comment